Your Source for Electronic Repair and Hobby Information
My First
Tesla Coil
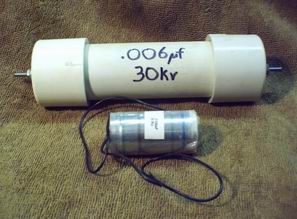
The first component I acquired was the high
voltage capacitor. I found this quite by accident! After having two RCA
high voltage splitters go bad, I decided to destroy one with a sledge
hammer. Inside, I found a rolled capacitor labeled .006mf / 30kv - exactly
what I had been looking for!
I sealed the actual
capacitor inside a piece of PVC pipe filled with silicone sealant. Two
bolts provide connections to the capacitor.
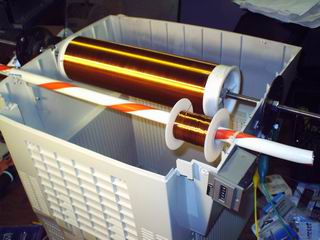
Then I needed to wind my secondary coil -
the most recognizable part of a Tesla Coil.
I'm not sure if I'm more proud of the coil or
the device that I had to build to wind the coil. For the frame, I used the
back of a computer monitor. A Power Wheels geared drive motor turns the
coil form. To keep track of the number of turns I've wound, I made a disc
with a notch cut out to interrupt an optical sensor which triggered the
counter from a photocopier. And for the final touch, a plastic candy cane
serves to hold the magnet wire feed spool.
Next I needed something to load the secondary with. Not being made of
money, I can't afford a spun aluminum torroid, so I'm going to have to
improvise.
I bought two frying pans from my local dollar store, ground the handles
off and soldered the two pans together. I soldered a nut to one of them to
make the top load easily interchangeable.
I was going to weld the pieces together instead of soldering them, but
the wire welder I have kept blowing holes through the thin metal. A 140
watt soldering gun and a little rosin did the trick.
The only thing about this that bothers me is the ridge where the solder
is. Since solder only goes surface deep, I couldn't grind that down
smooth. I'm hoping it doesn't affect the coil any.
I will post updates as my progress continues...
For
an EXCELLENT set of plans on building your own Tesla Coil, click
here. For a copy
of the safety precautions you should be aware of when building or working with a
Tesla Coil (or any other high voltage project), click
here.